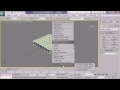
To see this tutorial in full quality, go to my website vfxworld.kilu.de ! NOTE: This is one part of the terminator eye tutorial, which shows how to get this effect: www.youtube.com Download the original footage: rapidshare.com In this part we'll use the added trackers from part 1.1 (Objecttracking in syntheyes 2008) to get a good solve. Moreover we will finetune the trackers in a good way. Also you'll learn how to remodell a part of an object using the solved 3d points. And of course we will correctly export the solve and the modell to use it in 3ds max. In the next part we will import the solve and place the remodelled half face site and I will show you how you are able to place and remodell the terminator head to get it look correctly. Part 1.1: syntheyes tracking. www.youtube.com Part 1.2: syntheyes solving. www.youtube.com Part 2: Importin&Placing in 3ds Max www.youtube.com Part 3: Drawing Opacity map www.youtube.com Part 4: 3D depth www.youtube.com Part 5: Blood and Eye Animation www.youtube.com Part 6: Compositing www.youtube.com Part 7: Remove the added Features www.youtube.com Part 8: Color Correction www.youtube.com
Artiste : 3D Max tutorial Titre de la vidéo : Terminator Tutorial p1.2: Solving and finetuning in syntheyes 2008 Catégories : 3Ds Max Vues : 419 Ajouté par : admin


-
Soyez le premier à commenter cette vidéo.